Showing posts with label Stamping. Show all posts

Wednesday, February 28, 2024

Scrappy Boy Stamps Cinderella Cleaning with Animal Friends

Welcome back! Today I am sharing my 3rd card using the Scrappy Boy Stamps Cinderella Stamp Set . I have had so much fun playing with this set! 


I was able to create a little scene using some freehand and the She's a Dream Background Stencil from Scrappy Boy Stamps. The Shoe and the Castle are from the Scrappy Boy Cinderella Scene Builder Stencil. I just inked the castle and then fussy-cut it. 

Supplies:

Copic Colors:
Skin: E04, E11, E21, E00, E000, E0000, RV23, RV21
Hair: Y24, Y23, YR30, YR20, E00
Clothes: BG75, BG72, BG70, E49, E47, E44, E43, E42, E40
Broom: E18, E15, E55, E53, E50
Birds: R85, R81, RV23, RV21, Y11, Y19, YR04
Girl Mouse: E49, E47, E44, E43, E42, RV21, B00, B0000, C1, C00
Boy Mouse: E49, E47, E44, E43, E42, R89, W6, RV21
White Wall: C3, C1, C00

Distress Oxide Inks:
tumbled glass
broken china

If you are interested in doing Copic coloring classes, there's a great opportunity coming in May...North Carolina Crafting Retreats is having a hybrid retreat... which means you can attend in person or online. I will be teaching 3 classes online! If you decide to sign up, make sure to let Cristena (the owner) know that I sent you! 


Thank you for stopping by! Have a craftastic day! 

Hugs, 
       Tina

Saturday, July 17, 2021

Scrappy Boy Music Card

 Hiya!! I am back with another Scrappy Boy Stamps creation! 

This time I used the I Can't Stop Singing set and Climb Every Mountain set. 


How fracking cute are these kids?!?! 
I colored these cuties with Copic markers. My favorite coloring medium. 


The paper I used is digital paper from GalleryTwelve on Etsy. I love using digital paper and Etsy has a ton of it. You can find papers for any occasion. 


I kept the card simple so the singers would remain the center of attention. 

Copic Colors
Skin: E04, E11, E21, E00, E000, E0000, R30
Boy Hair: E49, E44, E42, E40
Girl Hair: YR24, YR65, YR20, Y13
Red: R56, R29, R24, W5, W3
Blue: B39, B28, B24, B21
Black: T10, T8, T6. T4
White: T3, T1


Tina


Sunday, February 28, 2021

Best of Luck From Paper Nest Dolls Lucky Emma

 Good morning crafty friends!! Tomorrow is March. March has me thinking of Spring and St. Patrick's Day. Oh, how I am longing for Spring and warmer weather. Don't get me wrong, I love winter and all it has to offer, but my Fibromyalgia has been acting up something fierce. Which has me ready for warmer temps. 

Anyway, take a look at this adorable card! The image is Lucky Emma from Paper Nest Dolls. 


There is also a Lucky Owen. They would make a super cute card together. 

I will be doing a live tutorial today on this card and image on my Toadally Love to Craft Facebook page. Come and hang out with me! 4:00 PM PST/7:00 PM EST. 

Lucky Emma will be 50% off until tonight at midnight. Grab her while she is on sale and get a head start on your St. Patty's Day cards! 

All the dies used are from La-La Land Crafts. The sentiment is also. It's from the Best of Cluck Clear Stamp Set. I simply inked the stamp and then took a baby wipe and cleaned the ink off of the C. Tada! I had the perfect St. Patty's Day sentiment. 

Copic Colors

Skin: E04, E11, E21, E00, E000, E0000
Hair: E18, E17, E15, E13
Green: G99, G94, G24, G21, G20, G28, YG25, YG23, YG21
Black: T10, T8, T6, T3
Gold: Y28, Y26, Y23
White: T3, T0

Paper Nest Dolls
Lucky Emma

La-La Land Crafts

Best of Cluck Clear Stamp Set
Stitched Rainbow Die
Stitched Nested Hearts Die
Mushroom and Grass Border Die
Stitched Sun and Clouds Die
Halloween House 


Thanks so much for stopping by to visit. Hope to see you at my live today! Have a safe and happy Sunday.

Hugs, 
        Tina


Thursday, February 18, 2021

Paper Nest Dolls Build Your Own Nest with Laptop Girl


Hello there! After I shared the card I made with the Paper Nest Dolls Build Your Own Nest stamp set the other day, I decided to do another one...LIVE. 

In the Facebook live, I walk you through how to use the Build Your Own Nest digital stamps to create a scene and color a portion of the scene. 

This scene was originally created by Marina Vazquez. She is a crazy talented colorist! I wrote to her and asked her if she minded me doing a live on the scene she created. She said yes =)

So many people love the Build Your Own Nest stamp sets that Christine (the Paper Nest Dolls artist) is going to make more scene sets!! Isn't that exciting? I cannot wait! We were throwing ideas out to her during the live. 

Below you will find a list of all the Copic colors that I used. You can find the live video HERE and watch it on replay. 

Copic Colors 
Skin: E04, E11, E21, E00, E000, E0000, R22, R20, R30
Hair: E29, E25, E11
Clothes: V09, V04, V12, V01
Laptop: N10, N8, N4, R39, R37, R35
Chair/Ottoman: N8, N6, N4
Rug: BG49, BG45, BG11, BG10
Hardwood Floors: E49, E47, E44, E43
Lamp: N4, N3, N1, N0, Y11, Y000, Y0000
Lemonade: Y06, Y02, Y11, Y000
Ice: B000, B0000
Home Sign: E44, E43, E41, E40
Nail: N3, N1
Shelf: N3, N1, N0
Plant/Planter: E99, E97, E13, G99, G94, BG93, YG25
Candles: Y28, Y26, Y21, Y11
Books: R39, R37, R35, B99, B97, B95, E43, E41
Wall: RV10, RV000
Cast Shadows: BV23, BV20

Paper Nest Dolls has three different Build Your Own Nest stamp sets. 
Girl Time
Gamers
Family Room


Tuesday, February 16, 2021

Paper Nest Dolls Home Sweet Home Card

Hi friends! It's a cold snowy day here in Palmer, Alaska. I have been cuddled up in my chair coloring. 


I put together this scene with the Paper Nest Dolls  Build Your Own Nest (Family Room) and the Built Your Own Nest (Girl Time) sets. There are 34 stamps all together in these two stamp sets. If you purchase the Build Your Own Nest (Family Room) $8...you get the Built Your Own Nest (Girl Time) for FREE!!! That's a $4.50 savings. Only for the next 24 hours...hurry to the shop and get them while they are on sale!

Copic Colors

Skin: E04, E11, E21, E00, E000, E0000, R20, R30
Hair: E49, E25, E11
Shirt: 100, N8, N6
Jeans: B99, B97, B95
Cat: E30, E31
Books: E30, E33, YG17, YG11, RV59, RV69, R29
Planter: C5, C3, C2, C00, BG09, BG05, BG02
Plant: G99, G94, BG93, YG03
Couch: C6, C5, C4, C2
Rug: C3, C1, C00, BG09, BG05, BG02
Pillow: BG09, BG05, BG02
Lavender: BV04, BV02, BV00, G99, G94
Frame: E43, E42, E41, E40
Home Sign: E44, E43, E42, E41, E40
Lamp: 100, N8, N6, 
Flooring: E49, E47, E44, E43, E42

Happy coloring!! 
Hugs, 
       Tina

Thursday, February 11, 2021

Paper Nest Dolls Essential Workers

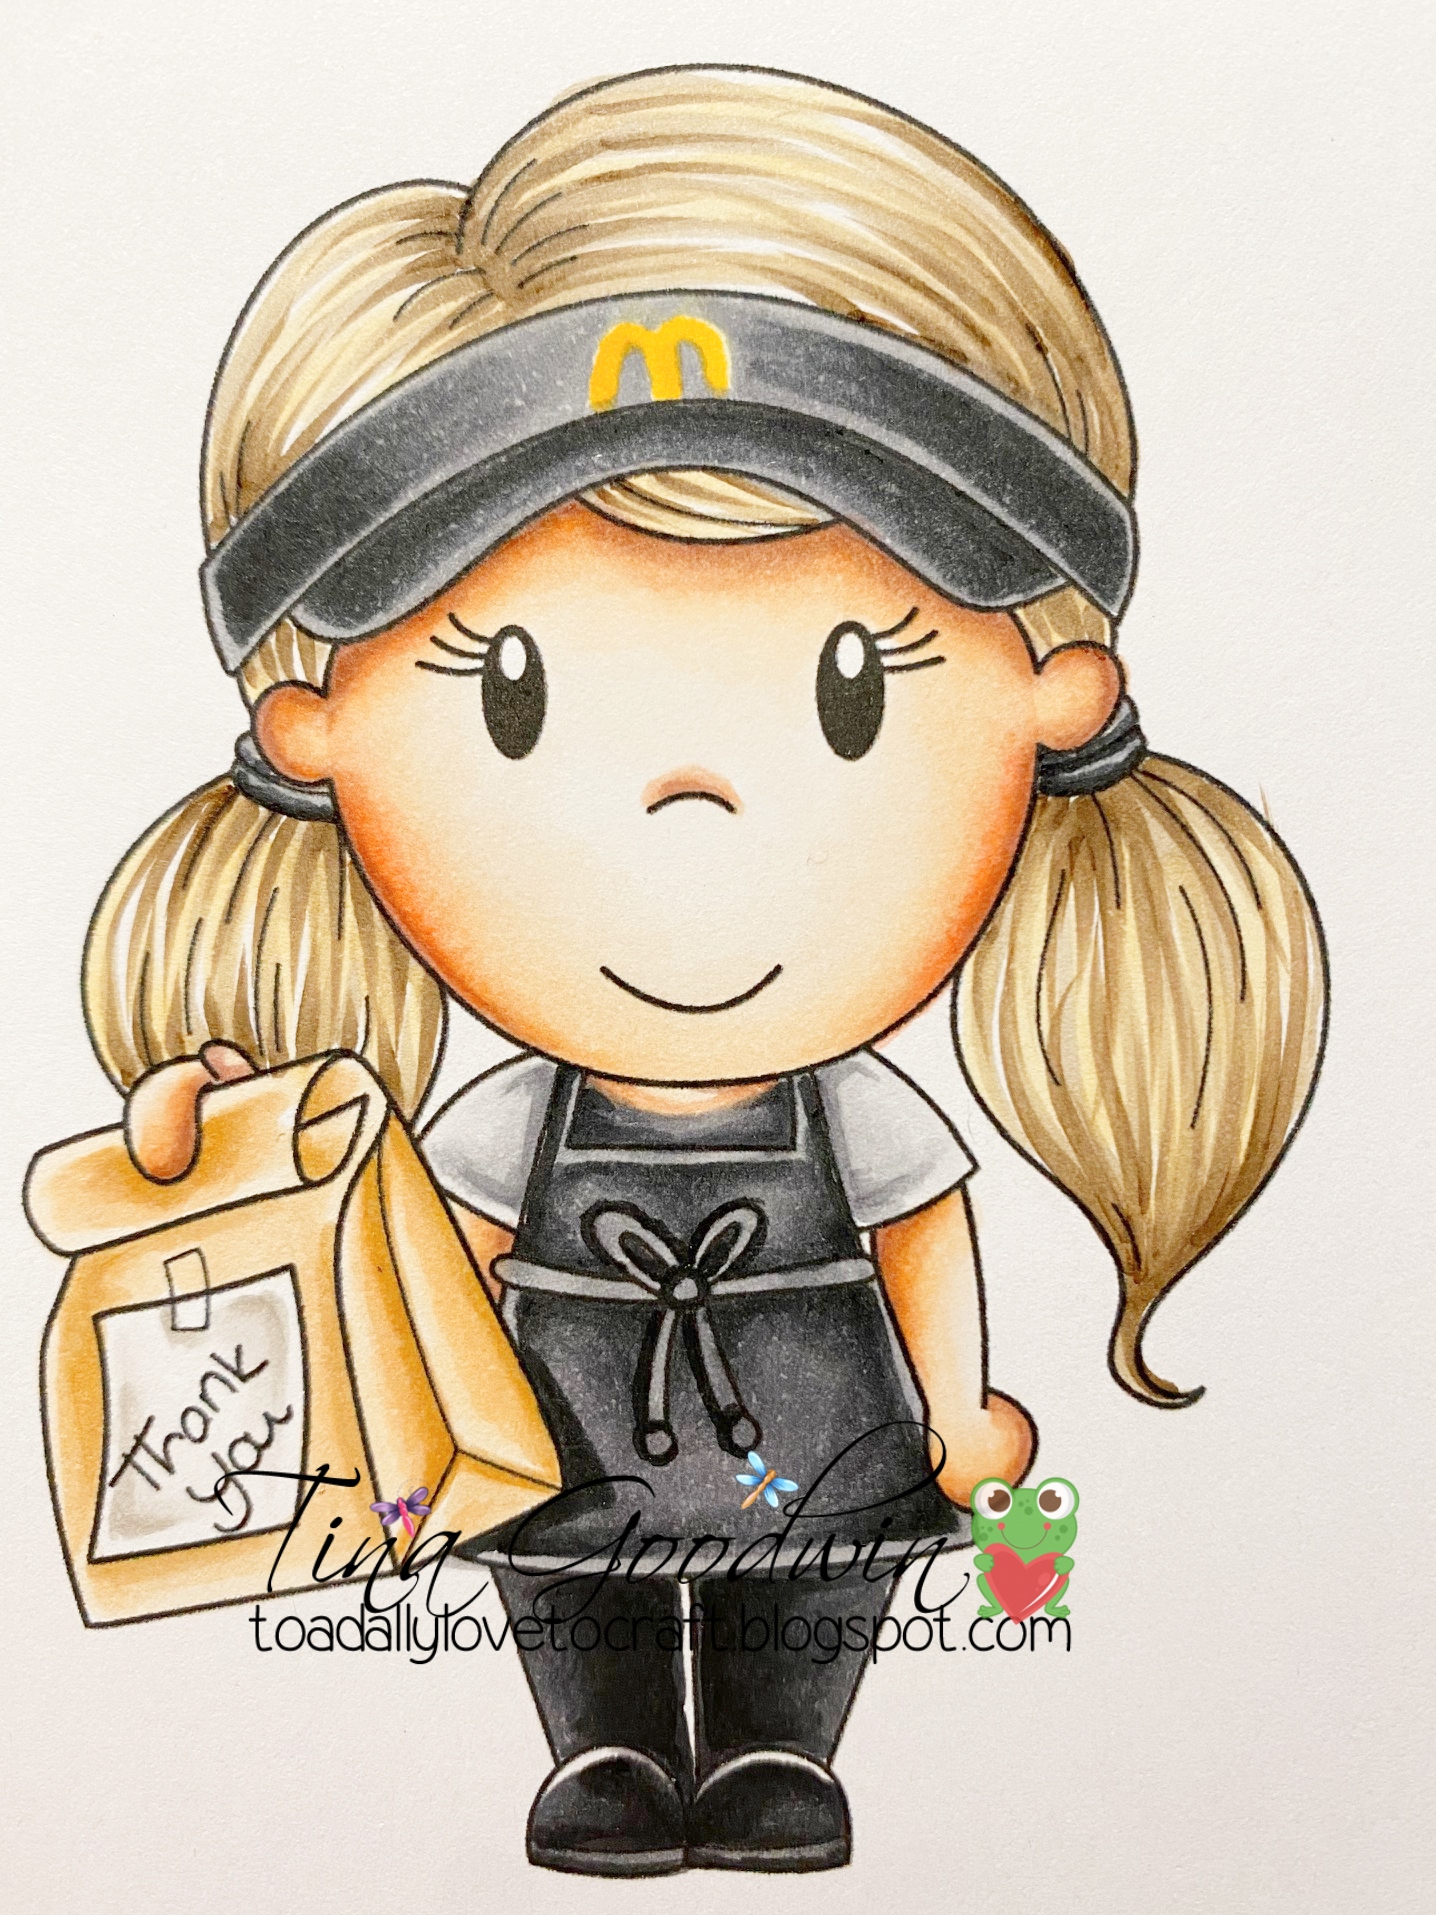
 I did it, you guys! I finally colored up all the Paper Nest Dolls Essential Workers. I love these stamps! They are adorable! 


I started coloring them while the Super Bowl was on and finished them over a couple of days. 

I did some experimenting with skin and hair tones. I have been looking for a dark skin tone that I like. One that has contrast...like the white skin combo that I use. I found that my favorite dark skin is the one on the officer. I will continue playing with the skin combinations and keep you all updated if I find another one that I like better. 

You can purchase the Essential Workers as a bundle or individually. 

The bundle is the best way to go. You save $17!! ( that's over 50% off!! ) If bought individually these images would be $35...instead, you get a total of 27 images for only $17 (9 Essential & 11 extra images to go with) Plussssss, you get the Mask Set FREE (7 masks included !)


Skin: E04, E11, E21, E00, E000, E0000, R22, R20, R30
Hair: 100, C8, C6, BV04
Shirt: W4, W2, W00
Vest: B28, B26, B24, Y15, Y11
Pants: W10, W8, W6
Shoes: W10, W8, W6, W4
Bag: T6, T4, T2, R89, R37, R35
Bag Contents: E55, E53, E51, E50, E35, E33, E31, E30, G99, G94, YG25, YR24, YR04, Y06, Y04

Fast Food Delivery Worker


Skin: E04, E11, E21, E00, E000, E0000, R22, R20, R30
Hair: E44, E42, YR31
Visor: N10, N8, N6, N4, Y17
Shirt: N4, N2, N0
Apron/Pants/Shoes: N10, N8, N6, N4
Bag: E55, E53, E51

Package Deliverer


Skin: E04, E11, E21, E00, E000, E0000
Hair: E29, E25, E11
Hat: T10, T8, T6, T4
Shirt: W5, W3, W1, W00
Jeans: B99, B97, B95, B93, B91
Shoes: E29, E27, E25, E23
Cup: R89, R39, R37, R36
Clipboard: E55, C6, C4, C2, Y19, Y15, Y11


Skin: E57, E23, E13, E11, E21, E00
Hair: E49, E47, E44, E42
Hat: T10, T8, T6, T4, Y28, Y26, Y23, Y21
Shirt: B95, B93, B91
Belt: T10, T8, T6, T4, Y28, Y26, Y23, Y21
Pants: B99, B97, B95, B93, B91
Shoes: T10, T8, T6, T4

EMT


Skin: E57, E35, E23, E13, E11, R43, R22
Hair: E49, E47, E44, E42
Shirt: B95, B93, B91
Belt: W8, W6, W4, C9, C8, C6, C4
Pants: B99, B97, B95, B93, B91
Shoes: E29, E27, E25, E23 
Bag: R89, R39, R37, R46, R27


Skin: E04, E11. E21, E00, E000, E0000, R22, R20, R30
Hair: E29, E09, E08, E99, E97
Shirt: YR24, R23, Y17, Y15, Y13, W9
Pants: C9, C7, C5
Shoes: E29, E27, E25, E23
Clipboard: E37, E35, E34, E33, E31, C5
Stethoscope: R85, R83, C5, C3, C1

Doctor


Skin: E04, E11, E21, E00, E000, E0000
Hair: E29, E25, E11
Shirt: E39, B37, B34
Tie: Y28, YR23, Y15, Y11
Coat: W6, W4, W3, W, W00
Pants: 110, W9, W6
Bag: 110, W9, W6, R89, R59, R56, R29, R24

Fire Fighter


Skin: E04, E11, E21, E00, E000, E0000
Hair: E49, E29, E25, E11
Hat: R89, R59, R56, R29, R24, Y28, Y26, Y23, Y21
Clothes/Boots: E57, E55, E53, E52, Y17, Y08, Y06, Y04
Fire Extinguisher: R89, R56, R29, R24, C6, C3, C1, R27, YR68, Y18

Mail Man

Skin: E04, E11, E21, E00, E000, E0000
Hair: E49, E29, E25, E11
Clothes: E25, E35, E34, E33, E31
Belt: E49, E47, E44, E43, Y38, Y35, Y17, Y13
Shoes: E49, E47, E44, E43
Box: E55, E53, E51Y38, Y35, Y17, Y13

Thank you for coming by to visit! Happy crafing! 

Tina

Sunday, January 31, 2021

Happy Birthday 8th Birthday Paper Nest Dolls!

 Hi friends! There are some pretty exciting things happening for me and Toadally Love to Crafts. I am now the manager of the Paper Nest Dolls Stamp Company! I cannot tell you how excited I am about this. 

I have been designing for Christine for 5 years this year. We have become great friends during this time. I love the freedom she gives her designers. It makes designing cards so much easier when you are not limited. She is also very supportive and encouraging. 

 Yesterday we celebrated Paper Nest Dolls' 8th birthday with a live coloring on my Toadally Love to Craft Facebook page. We had so much fun! We played games, chatted, and colored Ellie with Candle.


Ellie comes in rubber and digi. I used the digital version printing Ellie at 3.65 inches tall.
COPIC COLORS
Skin: E04, E11, E21, E00, E000, E0000, R22, R20, R30
Hair: E37, E35, YR24, YR20
Dress/Shoes: BV25, BV23, BV20, RV09, RV06, RV04, RV02
Candle: BG78, BG75, BG72, YR09, YR04, Y19, Y15
Cupcake: BG78, BG75, BG72, RV09, YR04, Y15

If you didn't see the live you can watch it on replay HERE.

The cupcake shaker portion of the card is a file from The Cutting Cafe. They have the cutest cutting files! I was able to cut the file with my Cricut Maker. 

If you are looking for some online fun, Paper Nest Dolls has a couple of virtual retreats coming up. On that is March 27th and 28th that is spring themed and another that is June 5th and 6th that is Disney themed. You can find more details for the March Spring Retreat HERE and the June Disney Retreat HERE. Both events will be SUPER FUN! 

I've got to run for now. If you have not already, please like and follow Toadally Love to Craft Facebook page, =) 

Have a craftastic week! 

Hugs, 
        Tina


Friday, April 27, 2018

La-La Land Crafts April 2018 New Release Blog Hop Day 1

Welcome to the La-La Land Crafts April 2018 Release BLOG HOP - Day 1!

You might've already seen that we introduced 2 NEW AMAZING PRODUCT LINES to the La-La Land Crafts range of products! Here is a little refresher for you to see what's new:

3 new CLEAR photopolymer stamp sets


and 4 new BACKGROUND red rubber cling stamp sets


All of these new stamps are available in our online store HERE!

Today our TEAM FRIDAY will have a NEW RELEASE overview for our 2 Day Blog Hop sharing our Inspiration projects.
Then on April 30th Team Monday will join in the fun and share their Inspiration projects too!

Now what is a BLOG HOP without some PRIZES?

WIN a $10 LLLC Store Credit on EACH of our DT members blogs!

Are you EXCITED??!!
Let's get hopping and see what our super talented Design Team ladies
have created as Inspiration for you today!


Stamps:

Dies:
Stitched Pennants Die
Balloons Die
Small Scallops Border Die

Colored with Copic markers:
Skin: E11, E00, E000, E0000, R30
Hair: E33, E31, E50
Dress and Headband: N39, B24, B16, B02
Brown Cow: E29, E25, E13, E31, E51, E50, R30, Colorless Blender
Black and White Cow: W10, W8, W5, W3, W1, C00, R30, Colorless Blender

Be sure to follow and leave a comment for EVERY stop along the way.
The more blogs along the hop you comment on, the more chances you have to WIN!

XOXO
Tina and Design Team Friday

Sunday, April 22, 2018

La-La Land Crafts New Release - From the Herd

Ready for more cuteness from La-La Land Crafts?!?! This set is one of my favorites from this release. It's one that was designed by Mindy =)


It is From the Herd. Aren't these the cutest critters EVER?!?! I mean, look at that cow! I instantly feel in love with her/him. 


La-La Land Crafts Cowboy Boots Marci was the perfect image to use with the From the Herd set.  I used the new Just For You background stamp to make the pattern on the lower part of Cowboy Boots Marci's dress. 


I colored Cowboy Boots Marci with Copic markers.

Skin: E04, E11, E00, E000, E0000, R20
Hair: E49, E25, E11
Dress: B99, B97, B95, B93, & Worn Lipstick Oxide Ink
Boots: E25, E33, E31, R32
Daisies: YR04, Y15, Y11
Cow: E29, E25, E33, E31, E53, E50, R20
Lamb: C00, C1, C3, C5, R20
Wood Rings: R32, YR04, YR16, Y10, Y15, Y11

Stamps and Dies Used...


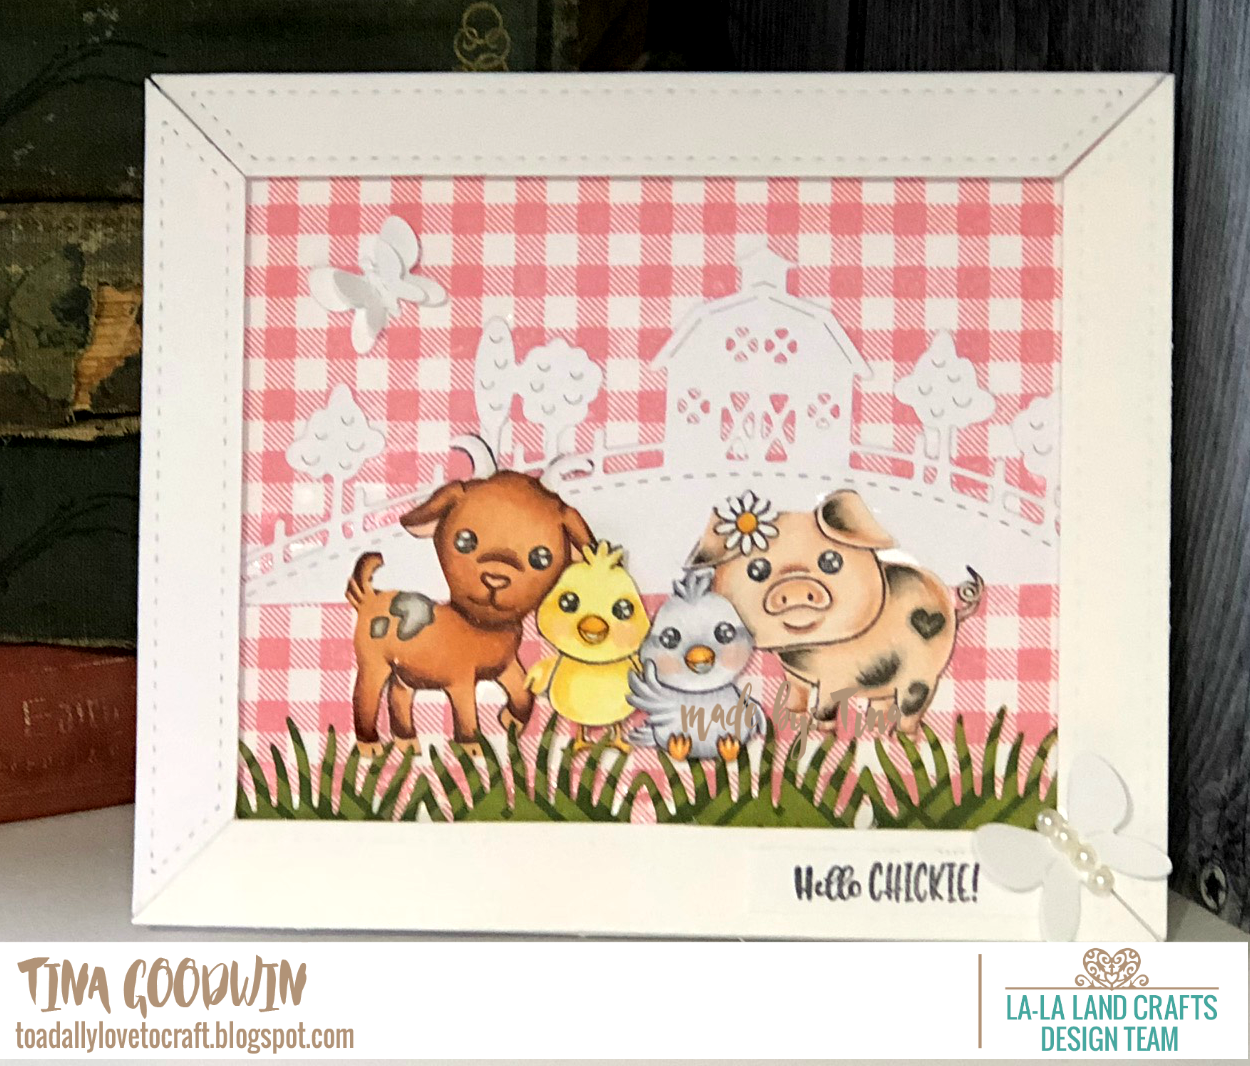
Here's one more! This one showcases the Just for you background stamp and the From the Herd set. 


I love these two sets together. 

I colored the images with Copic markers. 

Goat: E15, E08, E31
Chicks: C3, C1, C00, Y11, Y15, R20
Pig: E93, R30, W6, W3, W1

Dies and stamps used: 


For a limited time, La-La Land Crafts is having discounted prices on the New Release Stamp Bundles.  They also have the New Stamps priced individually so you can add them to your La-La Land Crafts collection slowly. 

Well, I hope you have enjoyed all of the new release stamp inspiration over the weekend. Hope you all have a craftastic week! 

Hugs, 
        Tina


Thursday, January 25, 2018

La La Land Crafts January 2018 New Release

Hi crafty friends! Today is a super exciting day. I FINALLY get to share the La La Land Craft projects that I made to go to CHA and the new release from La La Land Stamps. 

The first card I made features Thinking of You Marci. 


I colored Thinking of You Marci with Copic markers. I wanted her dress to look like jean material so after I was finished coloring it, I took a scrap piece of fabric, put colorless blender on it and then dabbed the jean fabric on Thinking of You Marci's dress. I love using this technique to add texture to clothing. 

I used the two flags die to make the boarder of Sparkly Red Vinyl flags. I love how the Sparkly Red Vinyl pops against the papers. 

Another fabulous new release stamp I had the pleasure of working with is Afternoon Tea Marci.

She is beautiful with her long hair and pretty dress. It wasn't hard to decide what colors I wanted to use for her. Her dress was screaming purple from the moment I laid eyes on her. I knew the perfect Copic combo...V09, V04, V01 and V000. I added sparkles to her dress with a white gel pen. 

To stick with the theme of tea. I made a teapot card for Afternoon Tea Marci. I embellished the teapot using the Shabby Flourishes Die Set, the Open Leaf Flourish Die, the Two Flags Die, the The Spoon and Napkin Die and the cup from the Large Teapot Die. Some of the die cuts are cut out of beautiful Sparkly Purple Vinyl. 

Take a look at the entire release. So many amazing stamps and dies. 


Just look at these stamps! Every single one of them are on my wish list! 


And these dies...SO FLIPPING AWESOME!!


You can shop the entire New Release HERE.


Copics
Skin: E04, E11, E21, E00, E000, E0000, R20 
Hair: R59, E08, E35
Headband and Heart: R89, 29, 05
Dress: B99, B97, B95, B93
Shoes: R89, R29, R05, C1, C00

La La Land Craft items used...
Afternoon Tea Marci Card 


Colored with Copic Markers
Skin: E04, E11, E21, E00, E000, E0000
Hair: E35, YR14, YR23, YR21
Dress and Headband: V09, V04, V01, V000
                                     G99, G94, Y03

La La Land Crafts items used...

Afternoon Tea Marci
http://www.lalalandcrafts.com/Afternoon-Tea-Marci-Rubber-Stamp-5366.htm?sourceCode=tina

Shabby Flourishes Die Set 

Thursday, January 18, 2018

Lollipop Card With La La Land Craft Fabulous Marci
Hi everyone! I am so excited to be writing my first tutorial for La La Land Crafts. This is also the first time I have made a lollipop card. 


Lets walk through the steps together. 

I always color my image first. 


I colored the Fabulous Marci Rubber Stamp with Copic markers. Starting out with the skin.

This is my go to skin combo. You can create many different looks with this combo. R20 is used for blush. 

After the skin is done, I move on to the hair. I love this color combination because it is simple with just three markers to use. 


From there, we move onto coloring the clothes and headband. I started by coloring the flowers around Fabulous Marci's waste, adding flowers to the headband and then coloring around the flowers with the black combo below. (also used this combo for her lips)

I used the same black color combination to color the dress. Once completely finished with the coloring, I added sparkles by using 110, C7 and a white gel pen. 

Use a sharp pair of scissors to fussy cut the image and set aside. 

Choose a cardstock that coordinates with your image, you will need two 2 x 12 inch strips. Double sided cardstock would be best. 

Score each 2 x 12 inch strip at every half inch and then fold accordion style.  


Hot glue the strips together at the ends.


Shape the cardstock strips into a circle and glue the ends together. 


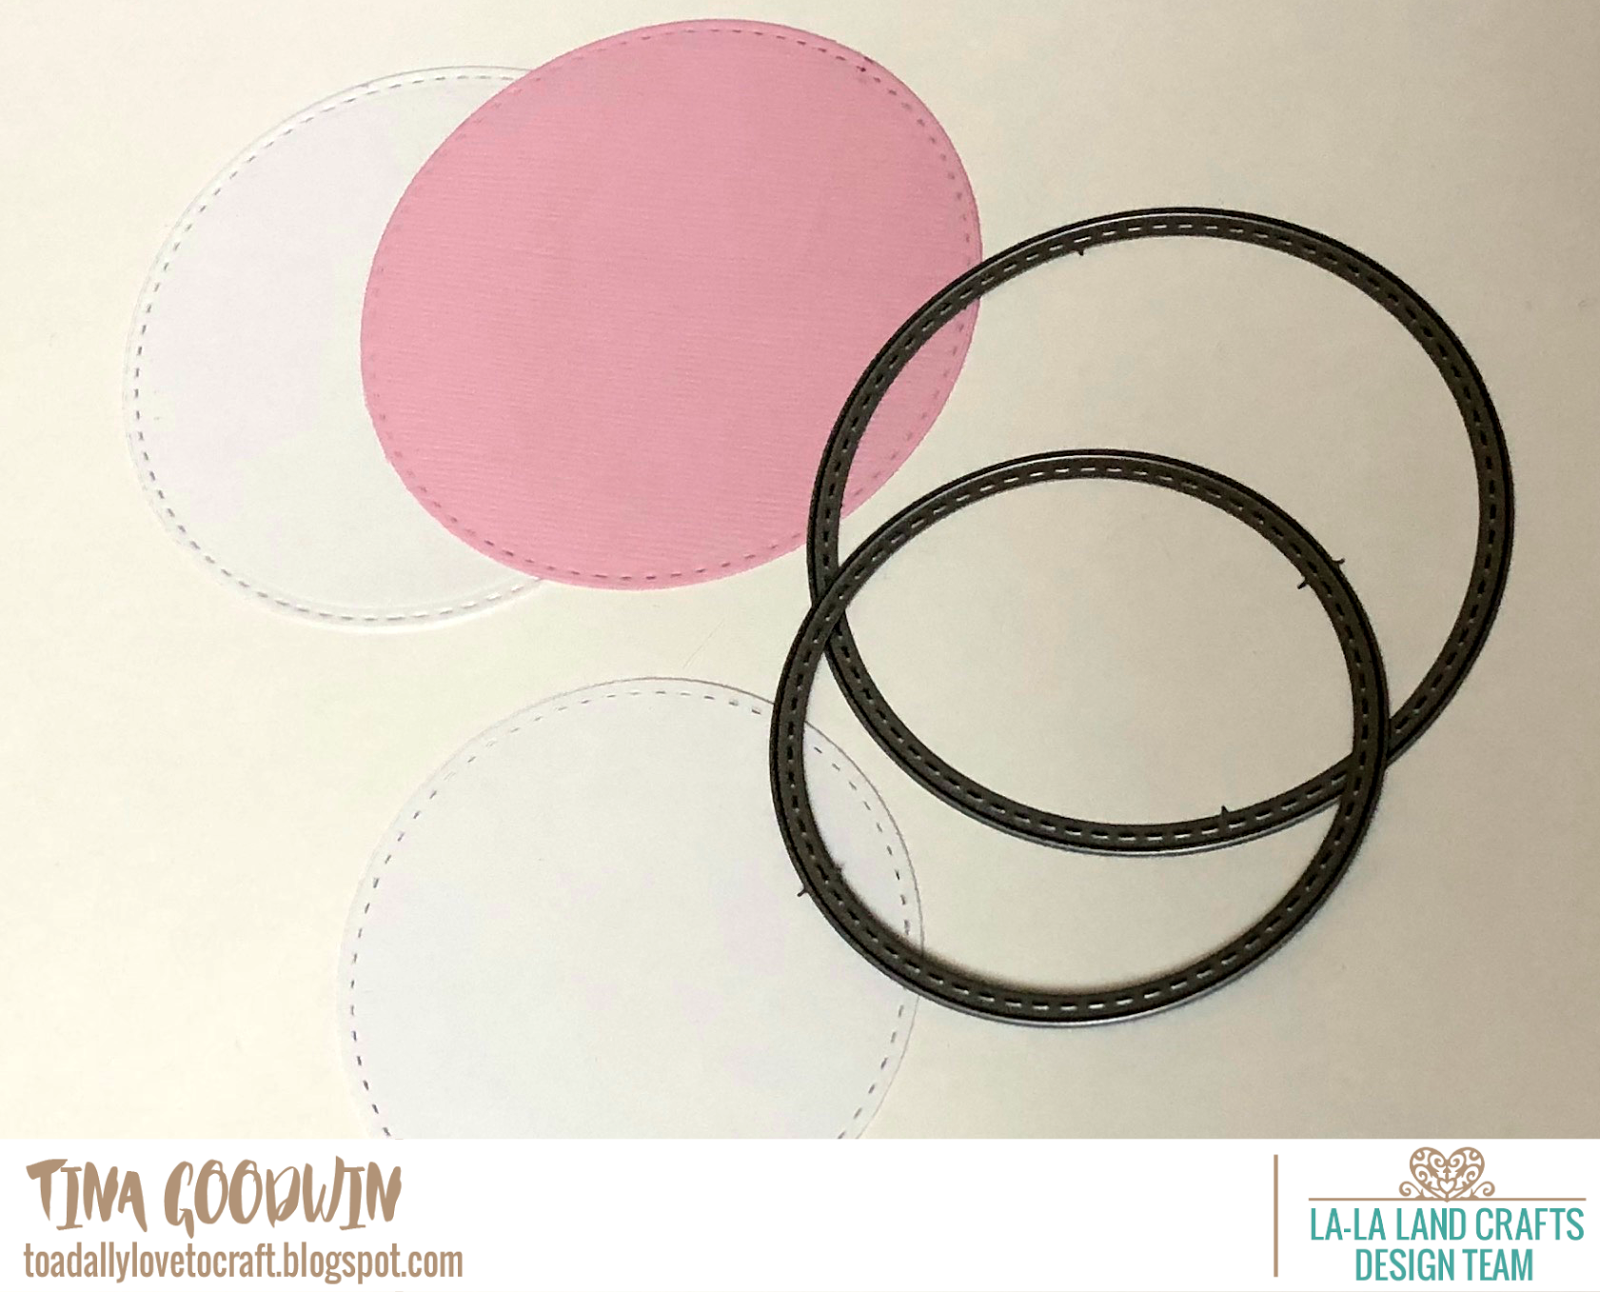
Cut out 5 circles. You will need two pink, two large white and 1 smaller white. 


You can make your rosette different sizes depending how much you leave the center open. I wanted to leave it bigger to accommodate Fabulous Marci. 

Hot glue one of the large white circles to the back of your rosette. 
Then take a paper straw and hot glue it between one of the pleats in the rosette. You will want to slide it up so the straw is sticking out above the rosette on the other side.  Hot glue the straw down on the circle. This will add a little more stability. 


I wanted to place a black doily over the white circle, but I didn't have one. So, as my husband would say I had to "Improvise, adapt and overcome." (He's a Marine)


I turned white doily black using Black Soot Tim Holtz Distress Ink. I only inked around the outside since the center of the doily will be covered by the circles cut out with the Stitched Nested Circles dies. 


Attach the doily over the white circle on the back of the rosette. Then place the large colored circle on top of it followed by the white smaller circle. The white circle will be where you write your message to the recipient of the lollipop card. 

Now to work on the front of  the lollipop card. 
Take the second large pink circle you cut and glue it to the white circle. The white circle is just to make the card more sturdy. (You may not have to have the large white circle if you make the center of the rosette smaller.) 
                                                                           
Hot glue lace to the bottom of the white circle. Hot glue the laced circle to the rosette. 


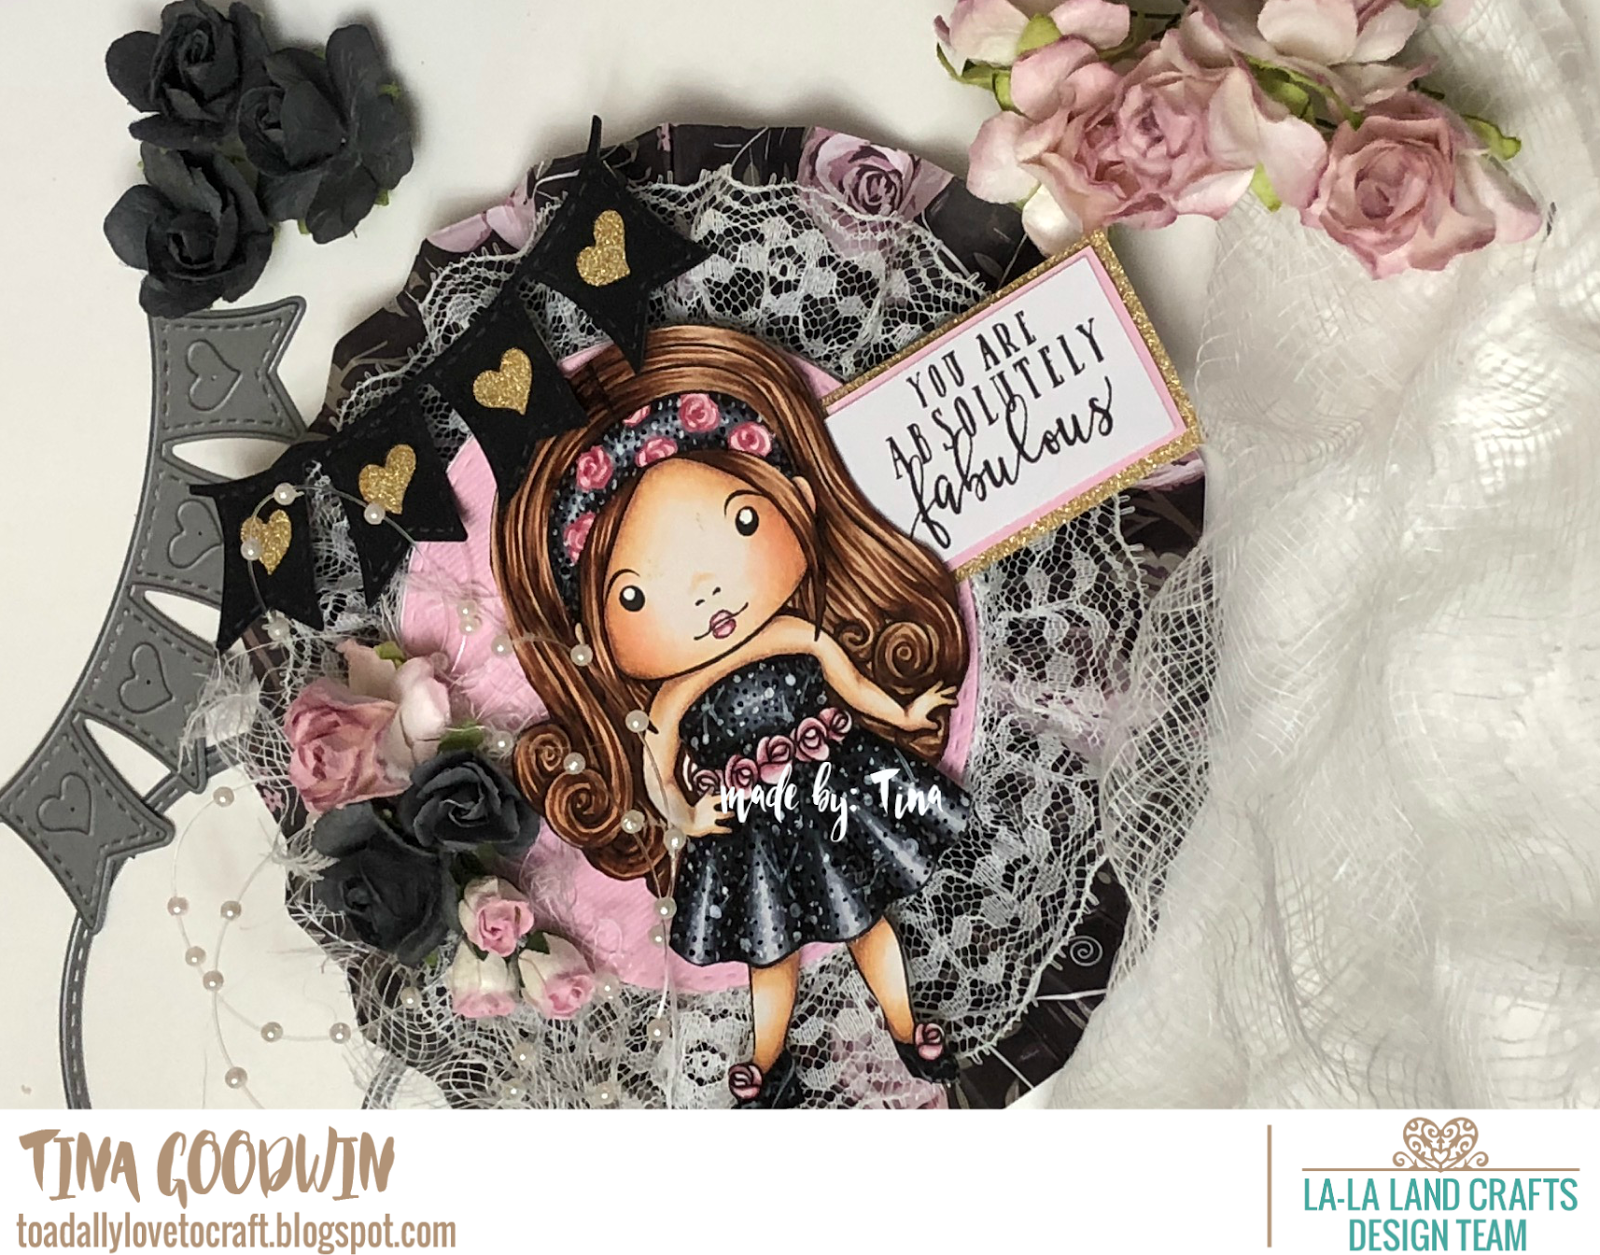
Embellish the front of your lollipop card. I decided to go with flowers, cheese cloth and stringy beads Heart Banner Die as embellishments. 


Now, add Fabulous Marci, the sentiment and any last minute embellishments. 


Viola!! You have a beautiful lollipop card ready to brighten someones day. 


Thank you for stopping by to check out my tutorial. Hopefully you are inspired to try one of these lollipop cards. It is a lot easier than I thought it would be.