Showing posts with label La La Land Crafts. Show all posts

Friday, May 10, 2019

La-La Land Crafts Tropical Paradise

Happy Friday friends! This week we are creating Tropical Paradise projects for La-La Land Crafts. Doesn't that sound wonderful. I don't know about you, but I sure could use a Tropical Paradise vaca. 


I used the new You Inspire Me Boackground Stamp Set to create the blue background. This stamp makes me think of water. 

I used Copic markers to color the image and the die cuts. I know I have said this before, but I love, love, love how the die cuts look when they are colored verses cut out of colored paper. However, it does take more time to color them. 

Below you will find a list of Copic marker combinations, stamps and dies that I used for this project. I am so glad that you stopped in to visit. You have a craftastic day! 

Copic markers

Skin: E04, E13, E11, E21, E00, E000,  Blush R32
Hair: E49, E25, E11
Swimsuit: YR15, Y17, Y15, Y11
Coconut: E49, E25, E33, 
Water: B18, B16, B14, B12, BG15
Sand: E25, E34, E33, E31
Trees: G99, G94, YG25, E25, E34, E31
Flowers: RV25, RV14, RV13, RV21, YR15, Y15, Y11

Stamps:

Dies:


Friday, June 22, 2018

Moving Parts with La-La Land Crafts

Hi all! Happy Friday! It's time for some La-La Land Crafts inspiration! Today the theme is moving parts. I had never made a card with moving parts before. Well, except for a shaker card. So this was a great theme for me. 


The gorgeous dolphins are from the newly released Jaws Because Clear Stamp Set.

Doesn't look like anything moves from the angle of the first picture, but the center dolphin is on a little spring. 


Here's a shot where you can see the spring. It's kinda fun playing with it and watching the dolphin bounce around. 


I colored the dolphins with Copic markers. 
 R83, R81, R10, RV00

Did you know that there is really such a thing as pink dolphins? There is a ton of pictures online of them if you Google them. 

If you wanted to do grey dolphins, my favorite Copic combo is C6, C4, C3, C1, and C00. 


La-La Land Crafts items used...

Jaws Because Clear stamp set
`http://www.lalalandcrafts.com/Jaws-Because_p_866.html?AffId=4

Waves Die
http://www.lalalandcrafts.com/Waves-Die_p_598.html?AffId=4

Stitched Sun and Clouds Die
http://www.lalalandcrafts.com/Stitched-Sun-and-Clouds-Die_p_749.html?AffId=4

Sea Critters Die
http://www.lalalandcrafts.com/Sea-Critters-Die-_p_875.html?AffId=4

Fishing Net Die
http://www.lalalandcrafts.com/Fishing-Net-Die-_p_889.html?AffId=4

Thank you so much for stopping by. Have a craftastic day! 

Hugs,
        Tina

Friday, April 6, 2018

La La Land Boots, Class and A Little Bit of Sass!

Happy Friday friends! 

It's inspiration Friday at La-La Land Crafts. Today's theme is ANYTHING GOES! I think this theme is one of the hardest for me. Lol...there's too many cute La-La Land Craft stamps to choose from!

I decided to use Cow Boy Boots Marci. She is the cutest stamp EVER! 


I colored Cow Boy Boots Marci with Copic markers and added little highlights with a white gel pen. I love how her boots turned out. I need a pair just like them! I have always wanted a pair of cowboy boots. 


I love the sentiments that come with Cow Boy Boots Marci

This one is especially country and fits me perfectly. 


You will find the complete list of dies and Copic markers that I used below. 


Thank you so much for stopping by today! Hope you all have a craftastic weekend! 

La-La Land Crafts Products

Cowboy Boots Marci 

Birch Tree Die

Nested Circles Stitched Die

Copics:
Skin: E04, E11, E21, E00, E000, E0000 
Blush: R20
 Lips: E04, R85, R83
Hair: E29, E25, E21
Dress: R85, R83, R81, BG15, BG11, BG10, G94, YG03
Boots: E33, E31, E25, BG15, BG10


Friday, January 26, 2018

January 2018 New Release From La La Land Crafts.

I'm back with more La La Land Craft goodness today! The last 2 out of the 4 cards pf mine that went to CHA. 

This first card features one of the Tea Time Kitten Stamps. They are so stinking cute! 


I even gave the little kitty a cat toy =) 


Copic Markers 
E15, YR14, YR16, YR23 R30
W10, W5, W3, W1

La La Land Crafts products used...

Stitched Nested Circles Set
Stitched Slots Die
http://www.lalalandcrafts.com/Stitched-Slots-Die-8345.htm?sourceCode=tina


On to my 4th and finial CHA project. Which just happens to me my favorite one!

Meet Jaunty Luka! Isn't he handsome?!?


I made a box card for Jaunty Luka. I filled it with lots of vintage die cuts from the new release


The books are old bibles. They belonged to my grandparents. They made the perfect props for this vintage box card.


My favorite thing about box cards is that it's a 3D card that will fold flat for mailing. 

Jaunty Luka is colored with Copic markers...
Copics:
Skin: E35, E33, E51
Hair: C10, C7, C4
Hat and Vest: E49, E29, E25, 
Shirt: G99, G94, BG93
Jeans: B99, B97, B95, B93

Stitched Nested Circles
http://www.lalalandcrafts.com/Stitched-Nested-Circles-set-of-7-Die-8091.htm?sourceCode=tina

Vintage Typewriter Die
http://www.lalalandcrafts.com/Vintage-Typewriter-Die-8350.htm?sourceCode=tina

Vintage Bike Die
http://www.lalalandcrafts.com/Vintage-Bike-Die-8351.htm?sourceCode=tina

Two Flags Die
http://www.lalalandcrafts.com/Two-Flags-Die-8364.htm?sourceCode=tina

Small Teapot Die
http://www.lalalandcrafts.com/Small-Teapot-Die-8361.htm?sourceCode=tina

This release from La La Land Crafts has a ton of amazing stamps and dies. Check them out!


Aren't they all fabulous!?!? How many items did you put on your wish list?
I want them ALL!!

Here's the link again http://www.lalalandcrafts.com/?sourceCode=tina ... just in case you HAVE to go shopping =) 

Thank you for popping in for a visit! 

Hugs, 
           Tina


Thursday, January 25, 2018

La La Land Crafts January 2018 New Release

Hi crafty friends! Today is a super exciting day. I FINALLY get to share the La La Land Craft projects that I made to go to CHA and the new release from La La Land Stamps. 

The first card I made features Thinking of You Marci


I colored Thinking of You Marci with Copic markers. I wanted her dress to look like jean material so after I was finished coloring it, I took a scrap piece of fabric, put colorless blender on it and then dabbed the jean fabric on Thinking of You Marci's dress. I love using this technique to add texture to clothing. 

I used the two flags die to make the boarder of Sparkly Red Vinyl flags. I love how the Sparkly Red Vinyl pops against the papers. 

Another fabulous new release stamp I had the pleasure of working with is Afternoon Tea Marci.

She is beautiful with her long hair and pretty dress. It wasn't hard to decide what colors I wanted to use for her. Her dress was screaming purple from the moment I laid eyes on her. I knew the perfect Copic combo...V09, V04, V01 and V000. I added sparkles to her dress with a white gel pen. 

To stick with the theme of tea. I made a teapot card for Afternoon Tea Marci. I embellished the teapot using the Shabby Flourishes Die Set, the Open Leaf Flourish Die, the Two Flags Die, the The Spoon and Napkin Die and the cup from the Large Teapot Die. Some of the die cuts are cut out of beautiful Sparkly Purple Vinyl

Take a look at the entire release. So many amazing stamps and dies. 


Just look at these stamps! Every single one of them are on my wish list! 


And these dies...SO FLIPPING AWESOME!!


You can shop the entire New Release HERE.


Copics
Skin: E04, E11, E21, E00, E000, E0000, R20 
Hair: R59, E08, E35
Headband and Heart: R89, 29, 05
Dress: B99, B97, B95, B93
Shoes: R89, R29, R05, C1, C00

La La Land Craft items used...
Afternoon Tea Marci Card 


Colored with Copic Markers
Skin: E04, E11, E21, E00, E000, E0000
Hair: E35, YR14, YR23, YR21
Dress and Headband: V09, V04, V01, V000
                                     G99, G94, Y03

La La Land Crafts items used...

Afternoon Tea Marci
http://www.lalalandcrafts.com/Afternoon-Tea-Marci-Rubber-Stamp-5366.htm?sourceCode=tina

Shabby Flourishes Die Set 

Friday, January 19, 2018

La La Land Crafts Fireman Luka Clean and Simple Card

Good morning! Popping in with a clean and simple card using the La La Land Crafts Fireman Luka Rubber Stamp.


Isn't HE the cutest!? Perfect for the clean and simple them we are creating with on the La La Land Crafts Blog.

I colored Fireman Luka  with Copic markers.

                                SKIN:


                                HAIR:


Uh oh! forgot to snap a picture of the clothes combo.
Clothes: E35, E33, E31

                                HAT:


                               HOSE:


                                WATER DROP:


I used burlap and colorless blender solution to create texture in Fireman Luka's clothes.
After coloring his hair, and skin, I colored the tan part of Fireman Luka's clothes and waited for the ink to dry. Once dry, I took a scrap piece of burlap and put some colorless blender on it and dabbed it on his clothes.

This is really a fun technique. You can do this with many other fabrics. Jeans, canvas...I've even used a beanie once. Give it a try. Remember not to soak your fabric with the colorless blender. It really doesn't take much to get the desired effect.

OOHHH!! I just had an idea! I will try it out before I tell you about it. I want to make sure it works before I tell you about it =)

Until next time, have a craftastic day!

La La Land Crafts items used...

Fireman Luka Rubber Stamp

Copic markers used...
Skin:E04, E11, E21, E00, E000, E0000
Hair: E35, E31, E51
Clothes: E35, E33, E31
Yellows: Y19, Y11
Hose:R59, R29, R05, TR24, Y19
Hat:110, C10, C7, C3, C1


Thursday, January 18, 2018

Lollipop Card With La La Land Craft Fabulous Marci

Hi everyone! I am so excited to be writing my first tutorial for La La Land Crafts. This is also the first time I have made a lollipop card. 


Lets walk through the steps together. 

I always color my image first. 


I colored the Fabulous Marci Rubber Stamp with Copic markers. Starting out with the skin.

This is my go to skin combo. You can create many different looks with this combo. R20 is used for blush. 

After the skin is done, I move on to the hair. I love this color combination because it is simple with just three markers to use. 


From there, we move onto coloring the clothes and headband. I started by coloring the flowers around Fabulous Marci's waste, adding flowers to the headband and then coloring around the flowers with the black combo below. (also used this combo for her lips)

I used the same black color combination to color the dress. Once completely finished with the coloring, I added sparkles by using 110, C7 and a white gel pen. 

Use a sharp pair of scissors to fussy cut the image and set aside. 

Choose a cardstock that coordinates with your image, you will need two 2 x 12 inch strips. Double sided cardstock would be best. 

Score each 2 x 12 inch strip at every half inch and then fold accordion style.  


Hot glue the strips together at the ends.


Shape the cardstock strips into a circle and glue the ends together. 


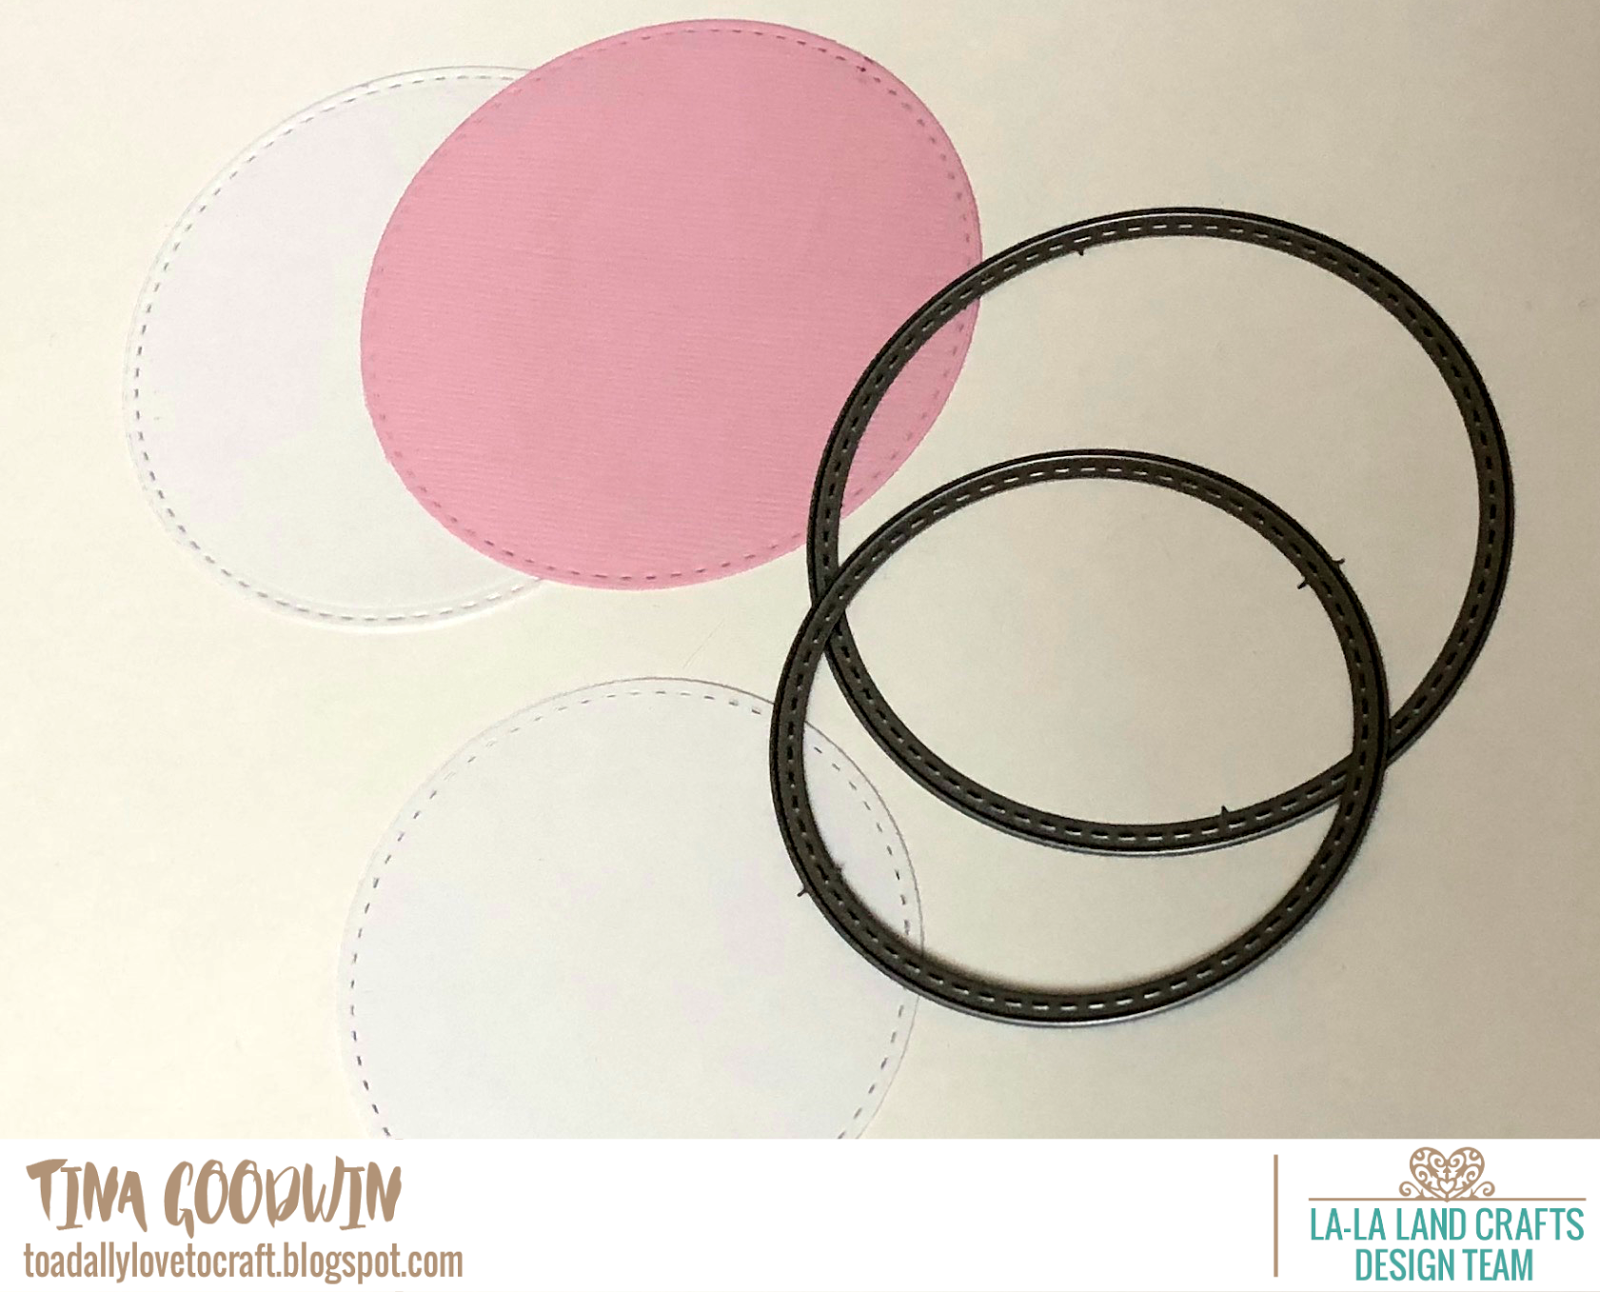
Cut out 5 circles. You will need two pink, two large white and 1 smaller white. 


You can make your rosette different sizes depending how much you leave the center open. I wanted to leave it bigger to accommodate Fabulous Marci

Hot glue one of the large white circles to the back of your rosette. 
Then take a paper straw and hot glue it between one of the pleats in the rosette. You will want to slide it up so the straw is sticking out above the rosette on the other side.  Hot glue the straw down on the circle. This will add a little more stability. 


I wanted to place a black doily over the white circle, but I didn't have one. So, as my husband would say I had to "Improvise, adapt and overcome." (He's a Marine)


I turned white doily black using Black Soot Tim Holtz Distress Ink. I only inked around the outside since the center of the doily will be covered by the circles cut out with the Stitched Nested Circles dies. 


Attach the doily over the white circle on the back of the rosette. Then place the large colored circle on top of it followed by the white smaller circle. The white circle will be where you write your message to the recipient of the lollipop card. 

Now to work on the front of  the lollipop card. 
Take the second large pink circle you cut and glue it to the white circle. The white circle is just to make the card more sturdy. (You may not have to have the large white circle if you make the center of the rosette smaller.) 
                                                                           
Hot glue lace to the bottom of the white circle. Hot glue the laced circle to the rosette. 


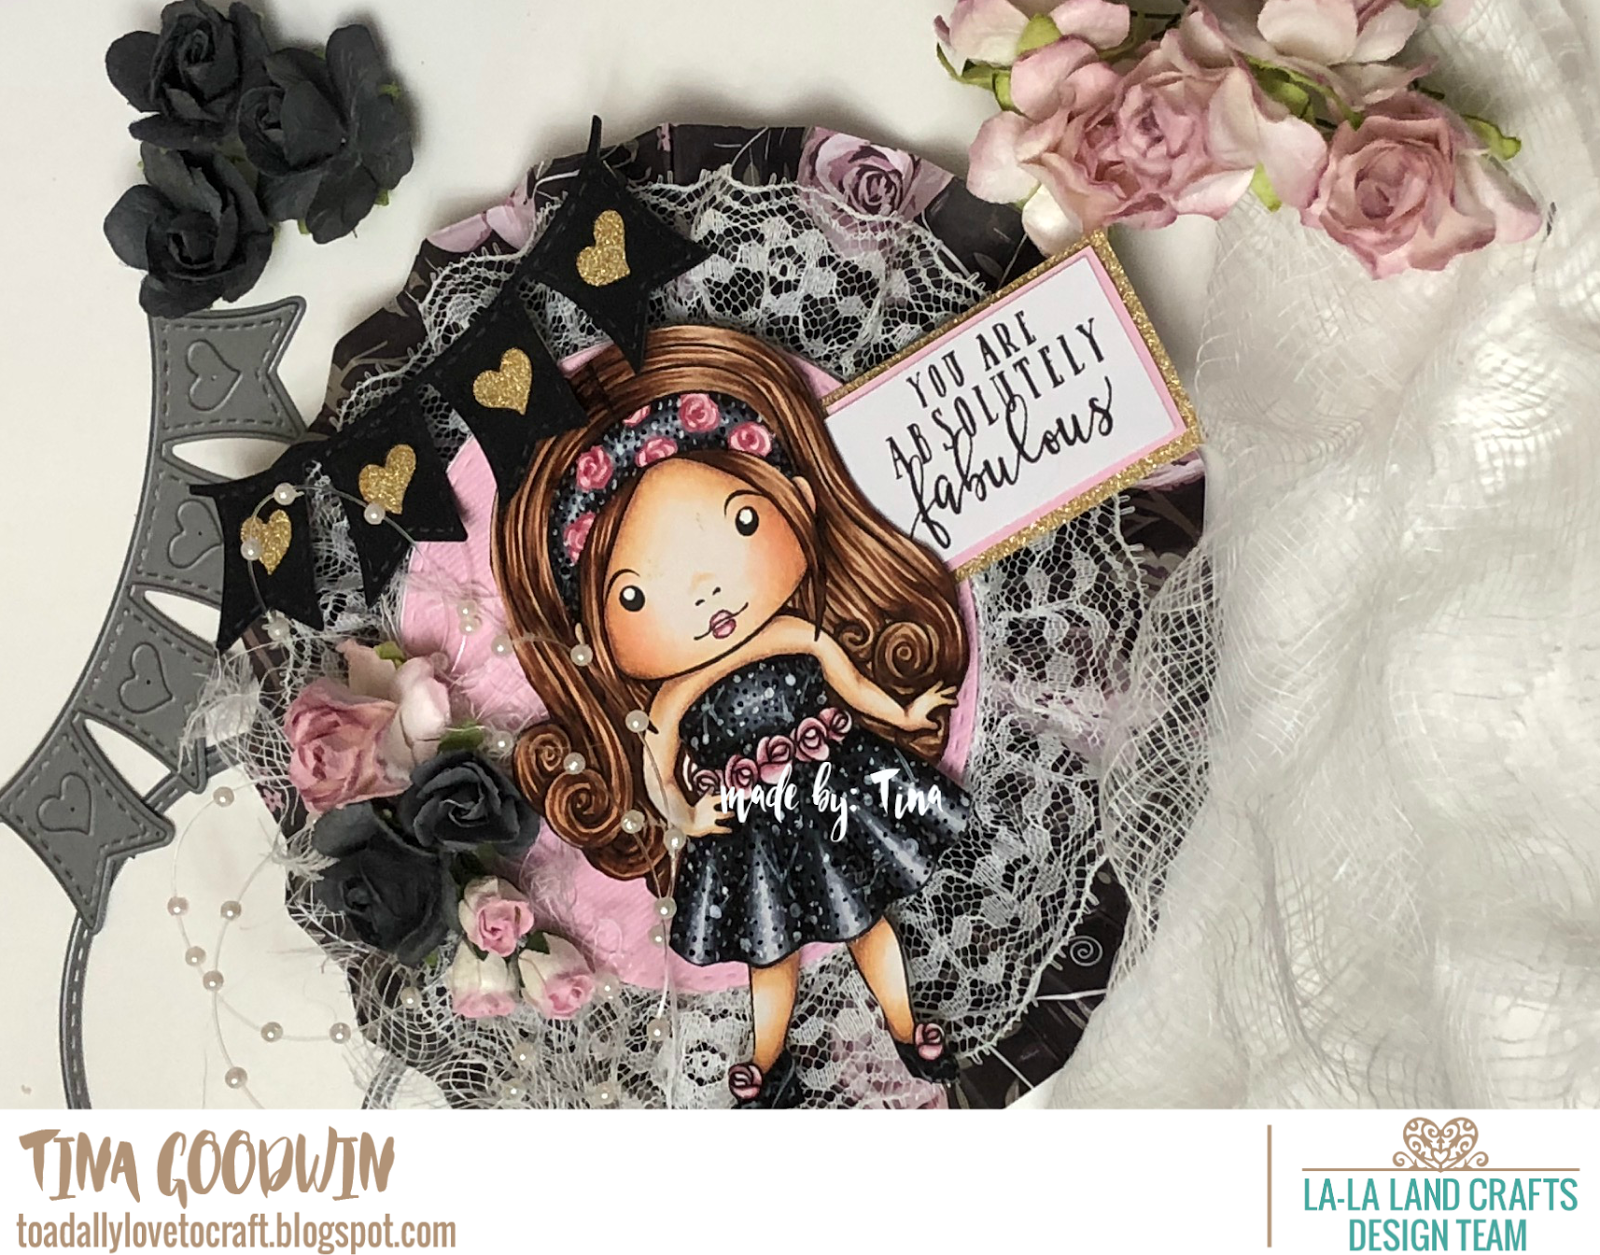
Embellish the front of your lollipop card. I decided to go with flowers, cheese cloth and stringy beads Heart Banner Die as embellishments. 


Now, add Fabulous Marci, the sentiment and any last minute embellishments. 


Viola!! You have a beautiful lollipop card ready to brighten someones day. 


Thank you for stopping by to check out my tutorial. Hopefully you are inspired to try one of these lollipop cards. It is a lot easier than I thought it would be.