Tuesday, July 21, 2015

Aquatica ATC's

Hi everyone! 

I am very excited to be participating in an ATC swap in a group on Facebook. We were to make 12 ATC's...the theme is Aquatica. Fun right?!? I found so many cute images that I wanted to use I couldn't settle on one. So, I used 5 different images. 

The first one I made was with the gorgeous Evie from Saturated Canary. I am in LOVE 
with these images! 


The second is another beautiful mermaid from Saturated Canary her name is Pearl.


This next little cutie is Mermaid Wishes from Fun Stampers Journey


The last 2 images are Ppinkydolls. Another one of my favorite places to get images.

This little guy is Hippocampus.


His little friends name is My Fish


Kristina, the owner of the Facebook group, made up this lovely back for our ATC's.
I inked it with  


 I thought I'd share with you how I made the "water" on the ATC. 


I got the idea from THIS YouTube video. I thought it was a genius idea! Instead of using colored sprays like she did in the video I used my Tim Holtz Distress Inks...Salty Ocean and Faded Jeans. 

After I had gotten about half way done with these cards I made a trip into Micheal's where I found this Ranger Embossing Dabber which I just had to have. I am so glad I got it! I normally would used my embossing ink pad on things I want to emboss...NEVER AGAIN! (unless it is a stamp of course) 
This dabber is so easy to use and you don't get it all over other things while using it. 
Anyways, I decided to use it on the remaining ATC's I dabbed the "water" and put a clear sparkly embossing powder all over it before adding my image and embellishments. 
I love the way it turned out! You can see a little difference in the pictures below, but these pictures really do not do the difference justice. 


The Seaweed is from Cricut Image Set Animal Kingdom, the Sand dollar is a freebie from SVGcuts and the Starfish is the star from image set When I was a kid. 

Here is a picture of all 12 ATC's together. Don't let there 2 & 1/2 x 3 & 1/2 size fool you. These lil' things are just as much work and just as much fun to make as any size layout or card. 


By the time I was finished I had come to the conclusion that I was crazy to use different images. 
Only because I loved each one so much I wanted to keep a copy for myself. Next time I will make them all the same and only have one extra to make for myself =) I think it would be neat to have one card from ever set of ATC's that I trade.  

 Thank you for stopping by today. Have a great day! 

Challenges Entered
Crafting From The Heart - Anything Goes
Craft Your Passion - Anything Goes
Through The Craft Room Door - Anything Goes


Sunday, July 19, 2015

Wooohooo!!! It's a free week for the DT at The Cutting Cafe!

Hello everyone! Can you tell by the title that I am ecstatic about this week being a free week? 
That means that the DT get's to chose whatever file they want for their project.
Choosing just one of The Cutting Cafe's files is nearly impossible for me...I love them all!
Ok, grab a beverage and sit back. This is going to be a post with lots of pictures =)


Going into this weeks assignment I had a goal in mind...to make cards for my Chemo Buddy and my Aunt who are both fighting breast cancer. I send at least one card a week to my Chemo Buddy. My sister and I take turns weekly sending to our Aunt. So, you can imagine how many cards I go through. I like to send homemade cards instead of store bought. 
This is where The Cutting Cafe is a life saver! 
Regina's files are super easy, cute and quick to put together. 

The first card I am sharing with you is the Sewing Machine Shaped Card.


Isn't this the cutest sewing machine ever?!? I absolutely LOVE it!
 I wish my sewing machine looked like this. The beautiful flowery paper was a gift from my crafty friend Diann Gaines. Thank you again Diann! 


For the next cutie I used the Paper Flower file and one of SherriAnn Baldy's 3D My Besties.


These are my favorite flowers. They are super easy to make. 


Regina has a video to show you how if you need help. 


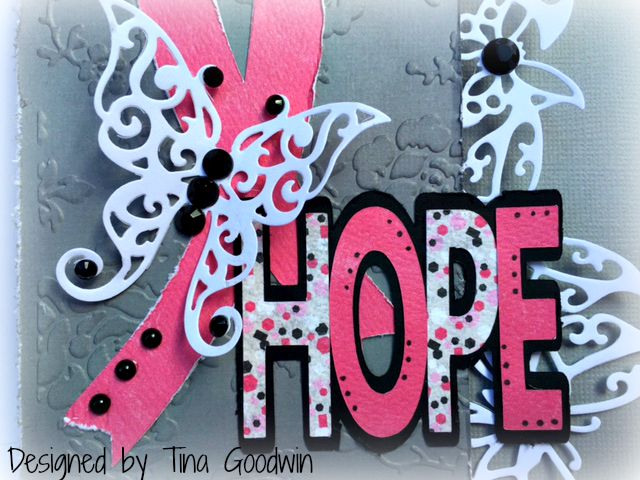
The next 3 cards are made with the Hope Shaped Card and the Believe Shaped Card.
These cards are perfect for sending to my Chemo Buddy and Aunt, but you could really use these for anyone needing some love or a little pick me up.


Here's those beautiful Paper Flowers again. 


I embossed the next card with the Anna Griffin Rosa embossing folder.
 This is one of my favorite embossing folders. 


The cancer ribbon is from the Cricut Image set Pink Journey.


The butterflies, dragonfly and the dandelion are all cut with metal dies. 

This sentiment is from the Sweet n' Sassy Stamp Set God is bigger.
 This set is the greatest! So many great uplifting sentiments.


And last, but not least...A CD Holder. I put all the pictures I took while my niece was here on a disc. This is the perfect holder for them. It is super simple to make. 


The state of Alaska is from the Cricut Image set 50 States.

My daughter Kylah made some awesome Treat Cup Cards.
For this week's assignment. You can check out her blog HERE.

Phew! You made it to the end! Thank you for having a look at my projects. Make sure you stop by The Cutting Cafe on the 21st to see the Design Team's inspirational post. If you leave a comment you'll be entered in a chance to win 3 free files of your choice. See you again soon!

Challenge Entered
Through the Craft Room Door - Anything Goes
Crafting From The Heart - Anything Goes
Craft Your Passion - Anything Goes
Lil Patch of Crafty Friends - Anything Goes


Monday, July 6, 2015

Campfire Sign For the July/August Edition Of Through the Craft Room Door


Campfire Sign

The July/August edition of the Through the Craft Room Door has been released! Let me tell you, you will not be disappointed. I absolutely love the projects and tutorials from the DT.

Here is what I made for the magazine. 


 If you would like more details and my tutorial, you'll  have to check out the magazine =) You can subscribe to the magazine HERE...It's only $18.00 a year. 

Here is a sneak peak of the magazine...


Hope you are all having a wonderful summer full of camping and fun.

Sunday, July 5, 2015

My Bestie Christmas in July

Wooohoooo! I've got 2 Christmas cards made already! I'm on a roll
 (Thanks to DT assignments and challenges).
At this rate I might be done by the time I need to send them out in December. 

For this card I used the adorable Winter Wonder Land Reindeer image by Sherri Ann Baldy. 


I just love this image! You can find her HERE. She is colored with watercolor pencils and Copic markers. 
The beautiful snowflake is cut with a die from my wonderful crafty friend Linda Simpson
Thanks again Linda! I am putting this snowflake to good use =)


The paper is from a me & my Big ideas pack of Christmas paper. 


I am really happy with how this card turned out. Lately I have been in a crafting funk. I think that's finally turning around =) 

Thank you for stopping by Toadally Love To Craft. Hope you all had a safe and fun 4th of July weekend. 


Christmas in July with The Cutting Cafe

Hello everyone! Only five months until Christmas. 
Are you making your Christmas Cards this year?
No time to start like the present! 
The Cutting Cafe has lots of files to help you get started. 


For this assignment I had the pleasure of crafting with my beautiful niece for the first time. 
Taylor was here by herself to visit us for 10 days. Her favorite room in the house was my craft room. 
We spent lots of time playing in there =) 

This was the first time Taylor had made a shaker card. She did a wonderful job!


We used the Christmas Shaped Shaker Card File to make our cards. 


I had so much fun crafting with Taylor. She is very smart and creative. 
We used my Cricut Explore to make our cards. Using the Cricut Explore was another first for Taylor, but you'd never be able to tell. She picked it up quickly and was using it on her own to make an Alaska scrapbook. 


One Christmas card down and MANY to go! Thankfully, Regina at The Cutting Cafe, has made making my cards easy and a ton of fun. Stay tuned for the DT inspirational post on July 7th. If you leave a comment on that post you will be entered in a chance to win 3 free files. 

Tuesday, June 30, 2015

Shoot For the Moon...New World Wide Open Design Team Monthly Challenge Blog


Hello! I'm back again with another post for a BRAND NEW challenge blog sponsored by the lovely Sherri Ann Baldy My Besties.


I've been telling you how much I love these images...
 So you will understand how excited I am to be on this design team.

Anyone who is on a design team can enter the challenges. 
There's even a fun Facebook Group for you to join if you'd like.


I used image My Bestie Image 379 for today's card. Isn't this image just too cute?!?!
I colored her with Prima Watercolor pencils and Copics. 

Here's a couple more shots...


The leaves were cut out with my Silhouette Cameo. 
I am new to this machine, but I am liking it so far.


I love this sentiment. It was written by my Cricut Explore. It also drew the stars and the moon by the sentiment. The writing functions is probably my favorite thing about this machine. 

Card Recipe
Cardstock (from my stash)
Flowers (from Micheal's)
Prima Watercolor Pencils
Foil Stars (from stash)
Lace from Goneartsy
Cricut Explore
Scotch ATG 
Hot Glue
Copics


3D My Bestie New My Besties Meet at the Scrappers Corner Challenge

Hello everyone! I am so excited to be posting as a new DT member for My Besties Meet at the Scrappers Corner Challenge Blog.
Today marks the beginning of a new challenge. 
We were asked to use a 3D Bestie for our inspiration projects. This is the first time I have done a 3D Bestie. It was a lot of fun. 


I absolutely love this image. Yes, I know it's July and a little early to be thinking of snow for most, but I live in Alaska where snow is possible any time of the year. We were up playing in the mountains playing in the snow in the middle of last month. 


You can find the image I used HERE.

I fussy cut the images as I watched a movie with the family. You can also use a cutting machine to cut these beauties out, if you have one. I will be trying that next time. 


I used foam tape in between the layers to add dimension. 


The edges of the paper is distressed with my handy dandy Prima paper distresser. I love that thing!
I added a few tiny snow flakes and attached them with foam tape.

This card was fun to make and went together super fast. Stay tuned for more 3D Besties from me =)

Card Recipe
3D My Bestie Image
Cardstock
Prima paper distresser
Foam Tape
Snowflake paper punch

Hope you will stop by an check out the new challenge at My Besties Meet at the Scrappers Corner Challenge Blog.

Challenges Entered
Scrapbook Stamp Society - #69 Anything Goes option Handmade flowers
My Bestie French Challenge Blog - Anything Option Summer
My Besties International - #13 Anything Goes
My Bestie Aussie - #7 Anything Goes