Sunday, August 27, 2017

Suse from Rubbernecker Stamps

Good morning friends! I am back with another adorable little girl stamp from Rubbernecker Stamps for Sweet Sunday Team inspiration. I'd like to introduce you to Suse. When I first saw Suse she made me think of my sister Daisy. Daisy was always a bright, happy kid. Her laugh was contagious. She can still make me laugh just by laughing herself =)


Since Suse reminded me so much of Daisy, I wanted to do something bright. 


I colored Suse's clothes in a Copic combo that I don't often use. Yellow. 

Dress, Bow and Shoes: Y11, Y15, YR04
Skin: E04, E11, E00, E000, E0000
Hair: E29, E25, E11 (my go to hair combo)


I used my Cricut Explore and Cricut Image Sets to cut out the Sun, clouds and sentiment. After cutting them out, I inked the edges of the clouds with Distress Ink and added highlights to the sun and sentiment with a white gel pen. You will see that I often use a white gel pen to add highlights. The highlights add character and depth to an otherwise flat object. Another way that I add depth to my cards is to use foam squares or tape. I love a card that has lots of layers. Don't get me wrong...I also LOVE clean and simple cards! 

If you'd like to see what the rest of the Rubbernecker Team came up with, head on over to the Rubbernecker blog. You are sure to be inspired! 

Thank you for stopping by! Have a craftastic day! 
Hugs, 
        Tina

Thursday, August 24, 2017

Reneabouquets Shabby Chic Lace Dress Card - by DT Tina Goodwin

Hello crafty friends! Today I am sharing a very shabby card that I made using products from Reneabouquets
Let me just say that I am in love with this card! I think it is my all time favorite out of all the cards I have made to date. 

I used three different laces from Reneabouquets. The Reneabouquets Trim Tattered Pink Pleated TulleNatural Cotton Crochet Lace - Cluny Lace 003 and the Doily Lace White 2 1/4 inch wide. These trims work beautifully together. 

I darkened up the colors of two of the lace/trim with Tattered Rose Distress Ink and Vintage Photo Distress Ink. 

I cut the corset out with my Cricut Explore. I used a hole punched and punched holes from top to the bottom so that I could string ribbon through. This made the corset look more real to me. After that, I added flat backed pearls to the top and bottom of the corset.

Once I had the dress all put together, I added the Tiny Treasures Sweet Dreams - Buttercream,


The key is also from Reneabouquets. It is in the Reneabouquets Keys Trinkets Pack.

Thank you so much for stopping by and checking out my shabby card. Have a craftastic day! 

Hugs, 
             Tina DT

Items used from Reneabouquets


You can find Reneabouquets here...

Reneabouquets

Reneabouquets Etsy shop

Monday, August 21, 2017

Cora from Rubbernecker Stamps

Hello friends! I have found a new stamp company! I should say new to me stamp company. Rubbernecker Stamps. A fellow crafter told me that Rubbernecker Stamps was having a DT call. I had to check them out right away! OH MY GOSH!!! Let me tell you, they have some of the funniest sentiments ever! And a ton of super cute stamps. Some are red rubber cling stamps and some are clear stamps. One thing for sure, there's stamps for everyone at Rubbernecker Stamps

I loved everything I was seeing at Rubbernecker Stamps so I decided to apply for the DT. GUESS WHAT?!?! I was chosen to be on their team! I couldn't be more excited. 


For my first Rubbernecker Stamps assignment, I chose to work with one of their adorable little girl stamps. I'd like you to meet Cora. She also has a die that can be purchased along with the stamp. It is called Cora's Die Cut.

Cora is a beautiful, but sassy little lady. Cora would look great colored in ANY media and ANY color combos. Since Copic markers are my favorite coloring media, I went with that. 


I started out by coloring Cora's skin and hair. 

Skin: E04, E11, E00, E000, E0000
Hair: E29, E25, E11

Once the skin and hair was done, I moved on to the clothes. 

Shirt and Bow: R81, R83, R85
Jeans: B93, B95, B97, B99


I added some highlights to Cora's clothes with a white gel pen. 

When I had the image completely colored, I picked out the papers I wanted to use and stamped the sentiment. The sentiment is also from Rubbernecker Stamps. It is called Be Your Own. This sentiment is perfect for Cora.


I distressed the papers for my card and added some pretty laces. I used foam squares to create a little depth to the card. 

Rubberneckers Stamps has a blog that is sure to inspire you. You can find that HERE. Make sure to subscribe to the blog so you can stay up to date on new released stamps! My card will be on the blog today! 

Thank you all for stopping by. Have a craftastic day! 

Hugs, 
       Tina

Sunday, August 20, 2017

3D Cups with The Cutting Cafe

Hi there! It is inspiration time for The Cutting Cafe DT.  Today we are working with a newly released file...the 3D Cup.  


I was a little nervous about making this 3D Cup. I am not very good at making 3D anything! It usually turns out all wonky. 

I was surprised when the cup went together quick and easy. I should have known it was going to be like that. I mean, I was using one of The Cutting Cafe files. ALL of their files go together easily. That is one of the many things I love about this shop! 

I love the paper on this cup! I cut the file out with my Cricut Explore, but you don't have to have a fancy machine to use files from The Cutting Cafe. They come in several different formats, including PDF. 

Once all the 3D Cup pieces were all cut out, I slapped this baby together in about 20 minutes. This would make a perfect gift for someone. Especially filled with hot cocoa! I love me some hot cocoa. I've already started drinking it this summer. The weather here has been cold and rainy. Fall is on it's way! 

Thank you so much for stopping by. Don't forget to go and check out what the rest of the DT did with the 3D Cup file. If you leave a comment on the DT inspirational post, you will be entered in a chance to win 3 free Cutting Cafe files of your choice. 

Have a craftastic day! 

Hugs, 
    Tina

Sunday, August 6, 2017

Christmas in August with The Cutting Cafe

Hello crafty friends. Today I have some Christmas inspiration for you. Since The Cutting Cafe didn't do Christmas in July, we are doing it in August! 


I decided to use the Bulbs for the Tree Printable Stamp Set from The Cutting Cafe along with an image from Paper Nest Dolls. I am really loving these Bulbs! They would make a super cute card all on their own.  
I colored the images with Copic markers.


 The Cutting Cafe has a ton of awesome files for all of your Christmas Projects. No cutting machine? No problem! The files also come in PFD format so you can cut them out by hand. 

Thank you so much for visiting! Be sure to stop by The Cutting Cafe on the 7th for the DT inspirational post. You are sure to see a bunch of great Christmas Projects. If you leave a comment on the inspirational post you will be entered in a chance to win 3 free Cutting Cafe files of your choice. 


Friday, August 4, 2017

Reneabouquets August 2017 Blessing Challenge

Hi all! I am up on the Reneabouquets Blog today with a new monthly challenge. You won't want to miss out on this! Renea has put together an awesome prize for the random winner. 

Here's the project that I made for inspiration. 


If you want to know more you'll have to hop on over to the Reneabouquets Blog.


Here's a picture of the prize! Awesome stuff! 


Can't wait to see your projects in the challenge! We are sure to have fun! 
 Hugs, 
        Tina
 Reneabouquets Products Used 

Mini Pink Sorbet Mulberry Paper & Roses Leaves Set
Sweetheart Lavender Glitter Glass
Shabby Lavender Roses Glitter Glass Butterflies
Teal Chunky Glitter Glass
Pink Chunky Glitter Glass
Reneabouquets Trim Sheer Romance Lace White

You can find Reneabouquets here...

Reneabouquets

Reneabouquets Etsy shop


Tuesday, August 1, 2017

Paper Nest Dolls New Fall Images Release

Hello friends! Today is the release of 4 new Paper Nest Doll images. Three of them are Fall images and one is a back to school image. I LOVE, LOVE, LOVE them! 
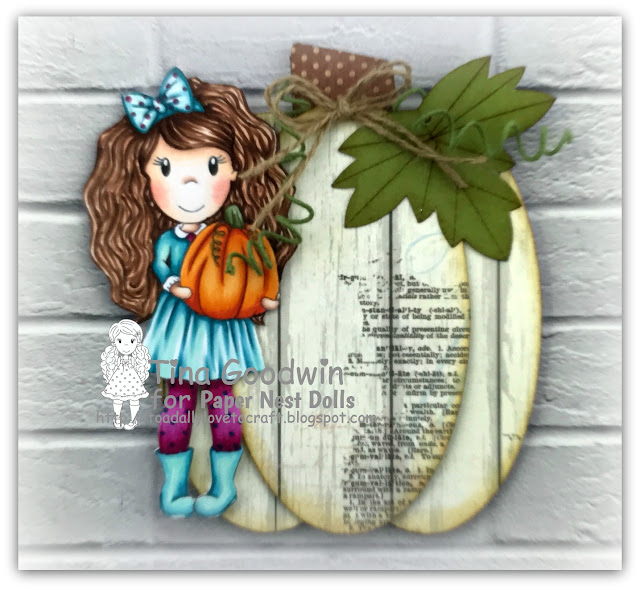
I have made two cards today using one of the images. ..Avery With Pumpkin.

It's amazing to me how different the same image can look when colored with different colors. Both images were colored with Copic Markers.
Copic markers used
Skin: E04, E11, E00, E000, E0000, R30
Hair: E29, E25, E11
Clothes: BG09, BG15, BG10, RV69, RV19, RV63
Pumpkin: YR09, YR04, YR15, G99, G94, BG93

This was the first time I have ever put freckles on a Paper Nest Doll. I love freckles and love how they look on Avery! You will be seeing more freckled face Paper Nest Dolls from me in the future =)

Copic markers used
Skin: E04, E11, E00, E000, E0000, R30 (blush) E97 (freckles)
Hair: E15, E08, E97
Clothes: RV69, RV19, RV17, E53, E51, E50, 
Boots: E29, E25, E33
Pumpkin: YR09, YR04, YR15, G99, G94, BG93

The adorable pumpkin is a file from The Cutting Cafe. It is the one of the files that come in the Halloween and Fall Shaker Cards Set. In this set, you get 5 different shaped shaker cards and a bunch of sentiments for a super great price. 

Here's a few more pictures...just because I love how these cards turned out =)


Thank you all for stopping by. Make sure you hop on over to the Paper Nest Doll Blog to check out the rest of the new Fall images. They are SOOOO CUTE!! 

Hugs, 
                      Tina Goodwin